> ## Documentation Index
> Fetch the complete documentation index at: https://docs.echoauth.dev/llms.txt
> Use this file to discover all available pages before exploring further.
# SMM Panel Automation Setup guide
> Go from license key to live, automated SMM order delivery in your own SellAuth shop.
EchoAuth connects your **SellAuth shop** to your **SMM panel**. When a buyer purchases a product, SellAuth calls your personal Dynamic Delivery URL, and EchoAuth places the order on your panel automatically.
This guide walks you through the full setup, from buying a license to your first delivered order.
**Before you start, have these ready:**
* A SellAuth shop with the products you want to automate
* An SMM panel account with API access (API URL + API key)
* A Discord webhook URL for order notifications (optional but recommended)
## Setup
Purchase a license from the [EchoAuth shop](https://shop.echoauth.dev/product/social-media-panel-automation). After checkout you receive a **license key** — keep it handy for the next step.
Every preset license includes a **+2 day setup buffer**, so a 1-month license gives you 32 days.
Go to the **Register** page and fill in a username, email, password, and the license key you just received, then click **Register**.
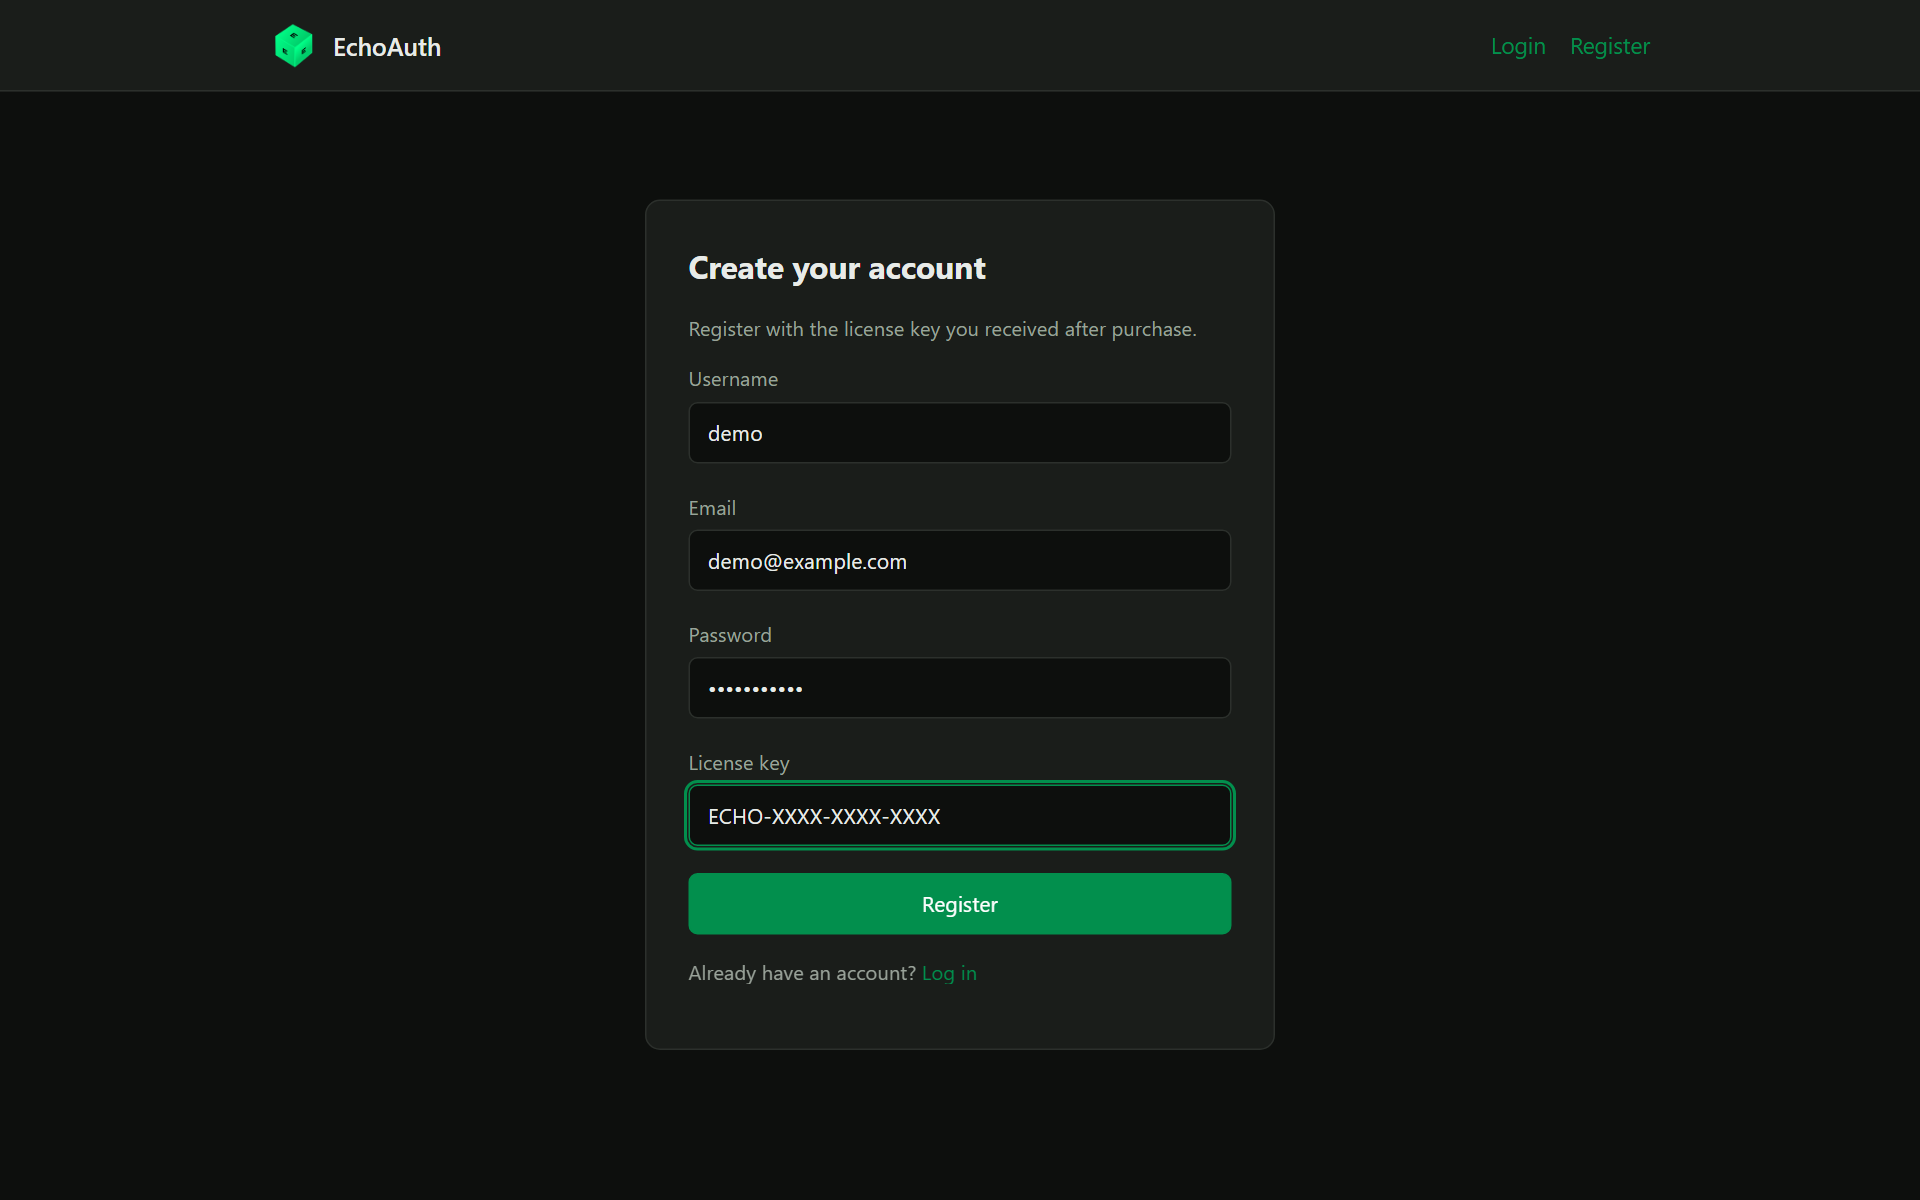 Right after registering, EchoAuth automatically provisions your own isolated order-processor. This can take a moment.
If you see a **"provisioning failed"** notice, don't worry. Finish the Settings step below, then click **Rebuild** on the Overview page. Contact support if it keeps failing.
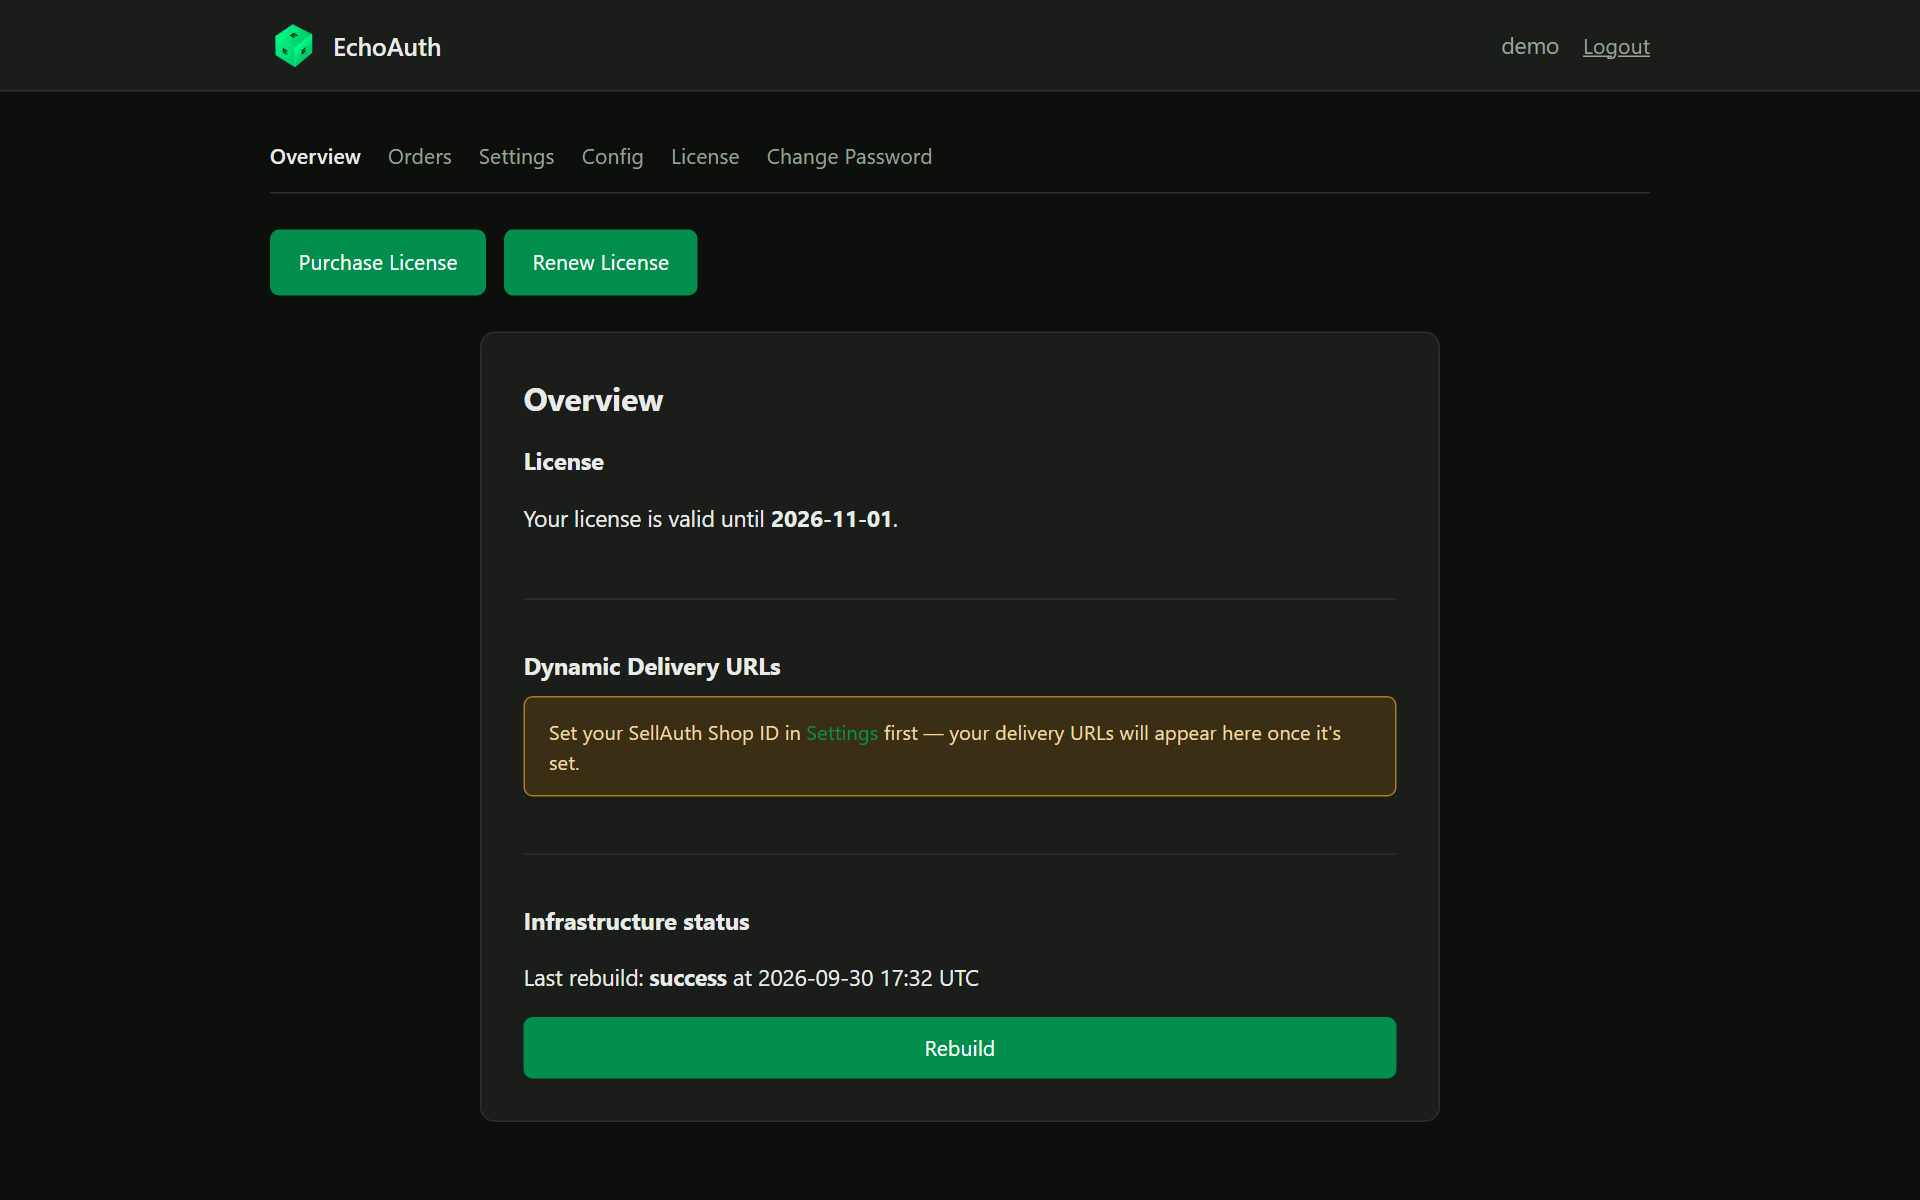
You land on the **Overview** page. It shows your license expiry, your Dynamic Delivery URLs, and your infrastructure status.
Your delivery URLs won't appear yet — first you need to set your SellAuth Shop ID.
Right after registering, EchoAuth automatically provisions your own isolated order-processor. This can take a moment.
If you see a **"provisioning failed"** notice, don't worry. Finish the Settings step below, then click **Rebuild** on the Overview page. Contact support if it keeps failing.
You land on the **Overview** page. It shows your license expiry, your Dynamic Delivery URLs, and your infrastructure status.
Your delivery URLs won't appear yet — first you need to set your SellAuth Shop ID.
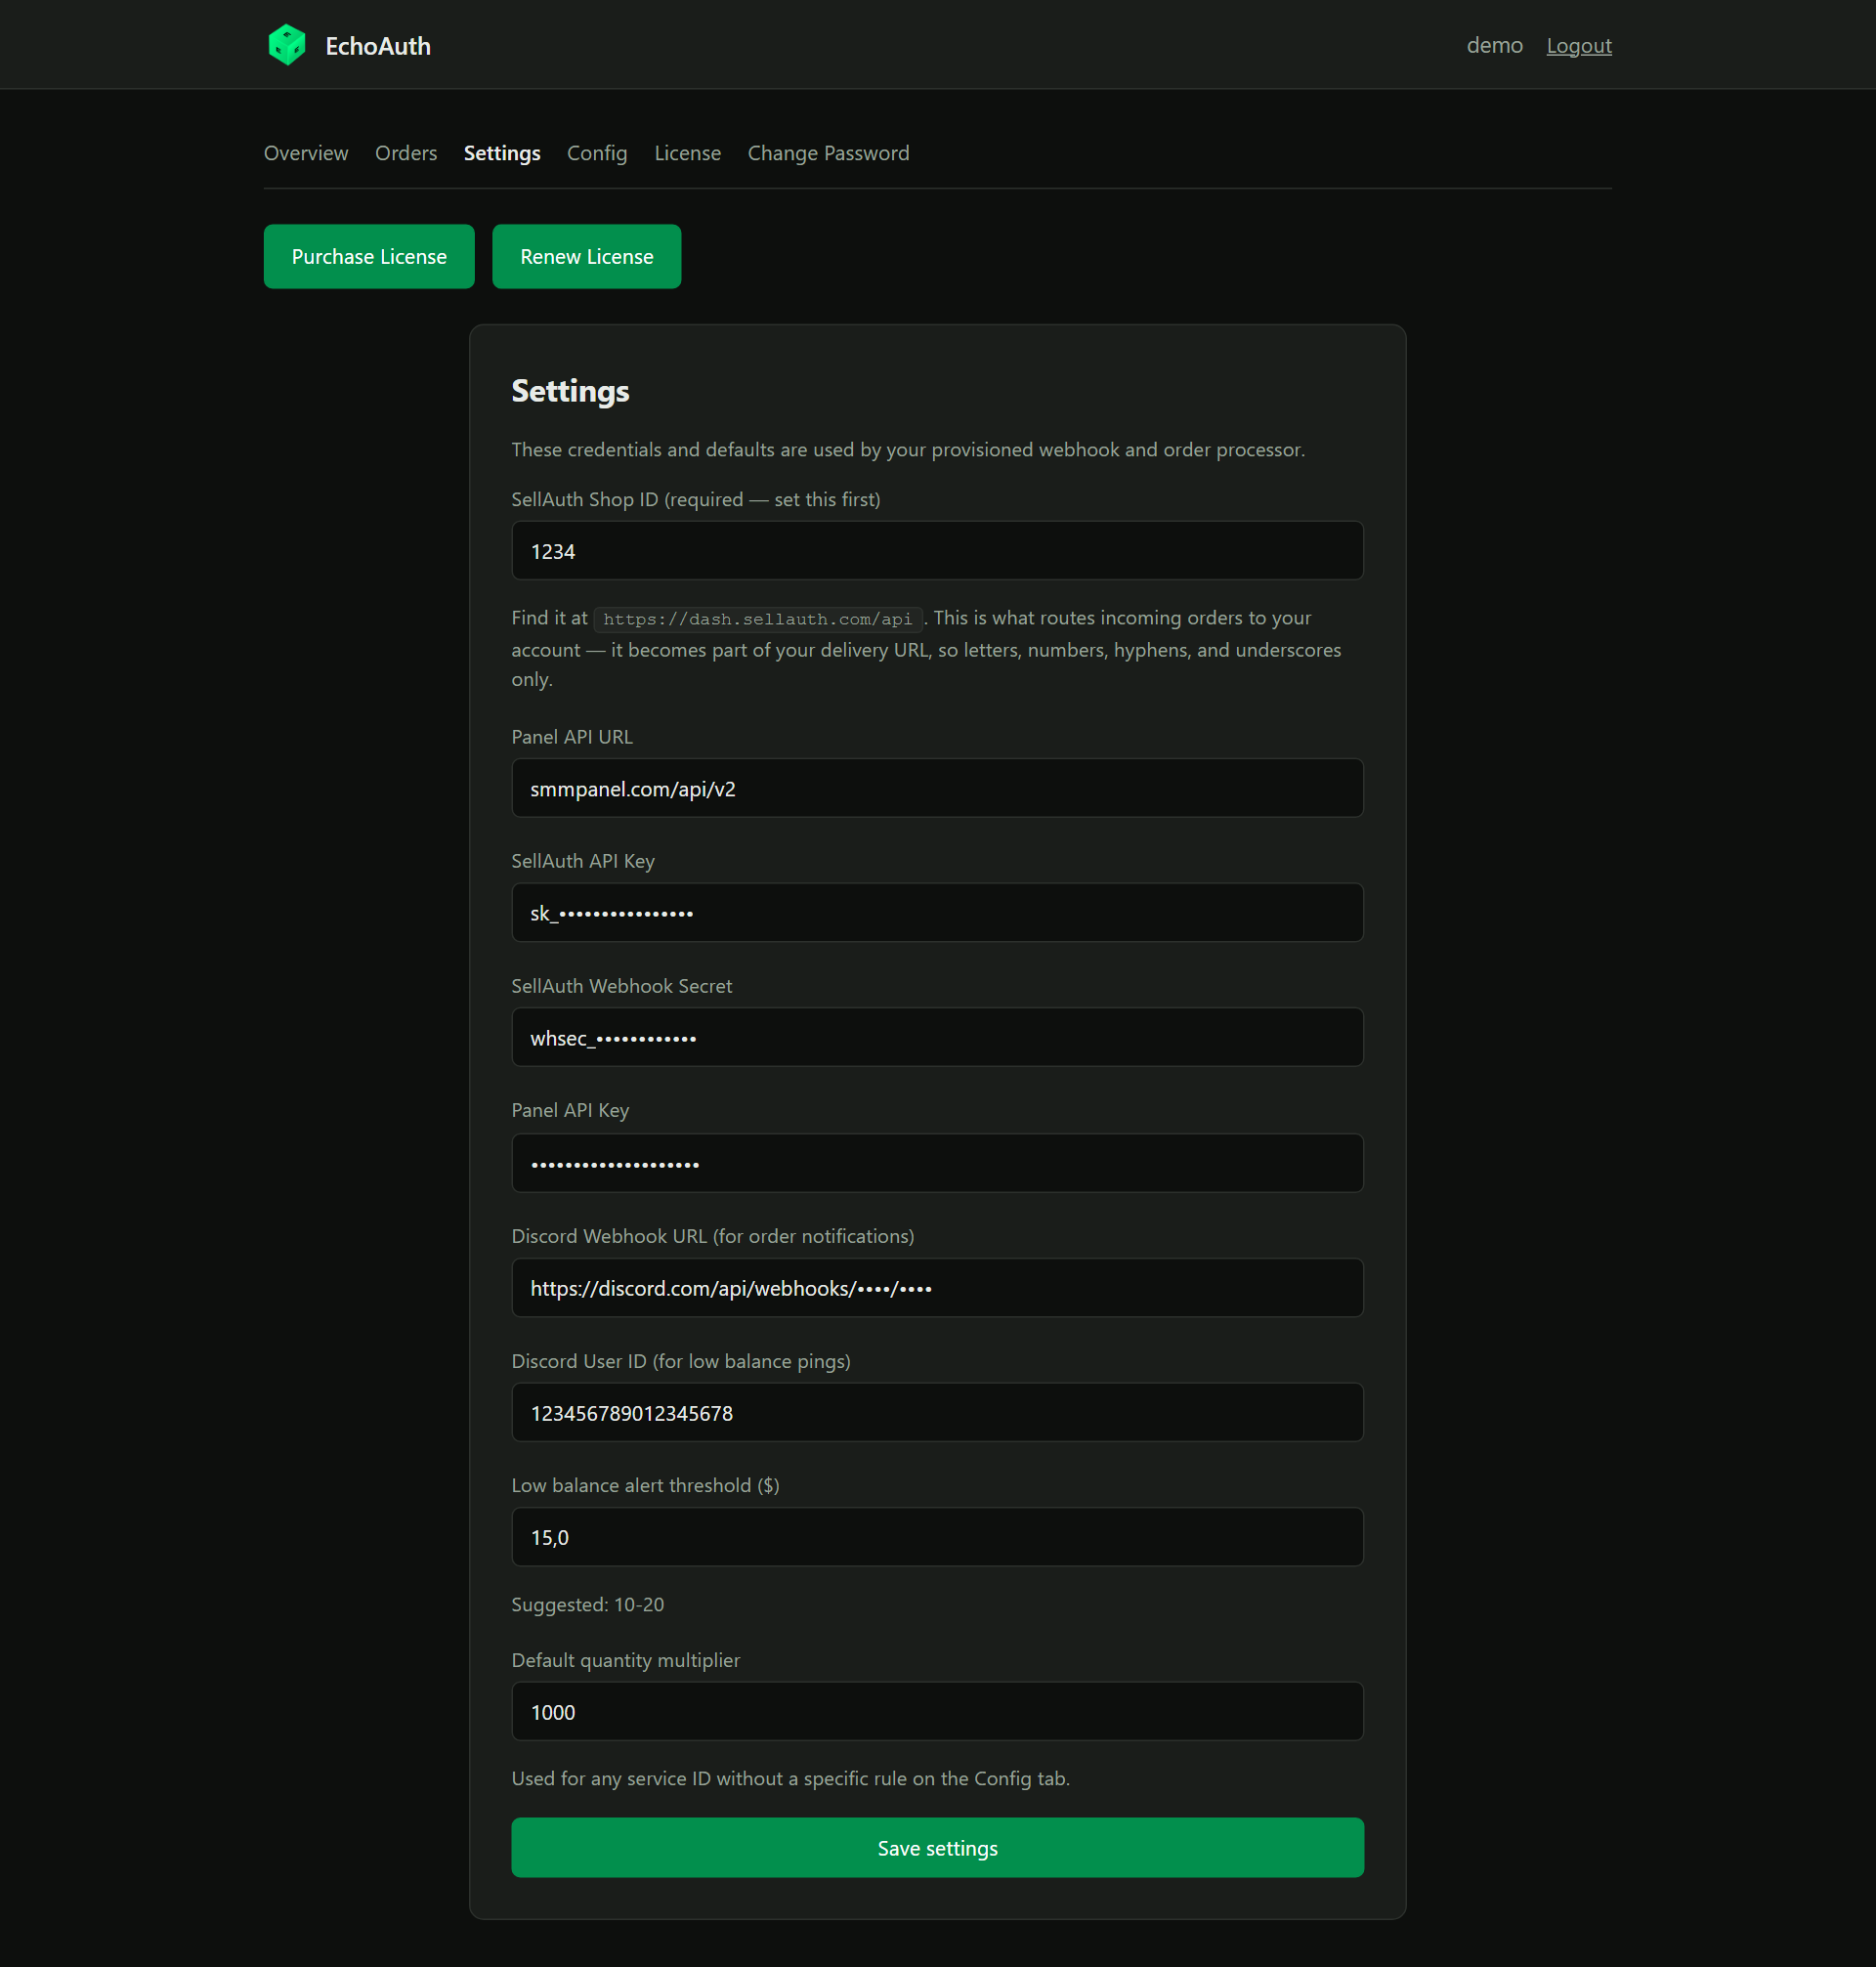
 Open the **Settings** tab. **Set your SellAuth Shop ID first** — it routes incoming orders to your account and becomes part of your delivery URL (letters, numbers, hyphens and underscores only).
Then fill in the rest of your credentials:
| Field | Where to find it |
| - | - |
| **SellAuth Shop ID** | [dash.sellauth.com/api](https://dash.sellauth.com/api) |
| **Panel API URL** | Your SMM panel's API endpoint, e.g. `smmpanel.com/api/v2` |
| **SellAuth API Key** | [dash.sellauth.com/api](https://dash.sellauth.com/api) |
| **SellAuth Webhook Secret** | [dash.sellauth.com/shop#miscellaneous](https://dash.sellauth.com/shop#miscellaneous) |
| **Panel API Key** | Your SMM panel's account section |
| **Discord Webhook URL** | Where order notifications and license expiry warnings are sent |
| **Discord User ID** | Who gets @-mentioned on low-balance alerts |
| **Low balance alert threshold** | Suggested \$10–20 |
| **Default quantity multiplier** | Used for any service ID without its own rule on the Config tab |
Click **Save settings**.
Open the **Settings** tab. **Set your SellAuth Shop ID first** — it routes incoming orders to your account and becomes part of your delivery URL (letters, numbers, hyphens and underscores only).
Then fill in the rest of your credentials:
| Field | Where to find it |
| - | - |
| **SellAuth Shop ID** | [dash.sellauth.com/api](https://dash.sellauth.com/api) |
| **Panel API URL** | Your SMM panel's API endpoint, e.g. `smmpanel.com/api/v2` |
| **SellAuth API Key** | [dash.sellauth.com/api](https://dash.sellauth.com/api) |
| **SellAuth Webhook Secret** | [dash.sellauth.com/shop#miscellaneous](https://dash.sellauth.com/shop#miscellaneous) |
| **Panel API Key** | Your SMM panel's account section |
| **Discord Webhook URL** | Where order notifications and license expiry warnings are sent |
| **Discord User ID** | Who gets @-mentioned on low-balance alerts |
| **Low balance alert threshold** | Suggested \$10–20 |
| **Default quantity multiplier** | Used for any service ID without its own rule on the Config tab |
Click **Save settings**.
 Panel API credentials are only picked up by your order processor after a **Rebuild**. You'll do that at the end of setup.
Open the **Config** tab. It controls how incoming orders are turned into panel orders. Each section has its own **Add** and **Save** button — nothing is stored until you click Save.
Panel API credentials are only picked up by your order processor after a **Rebuild**. You'll do that at the end of setup.
Open the **Config** tab. It controls how incoming orders are turned into panel orders. Each section has its own **Add** and **Save** button — nothing is stored until you click Save.
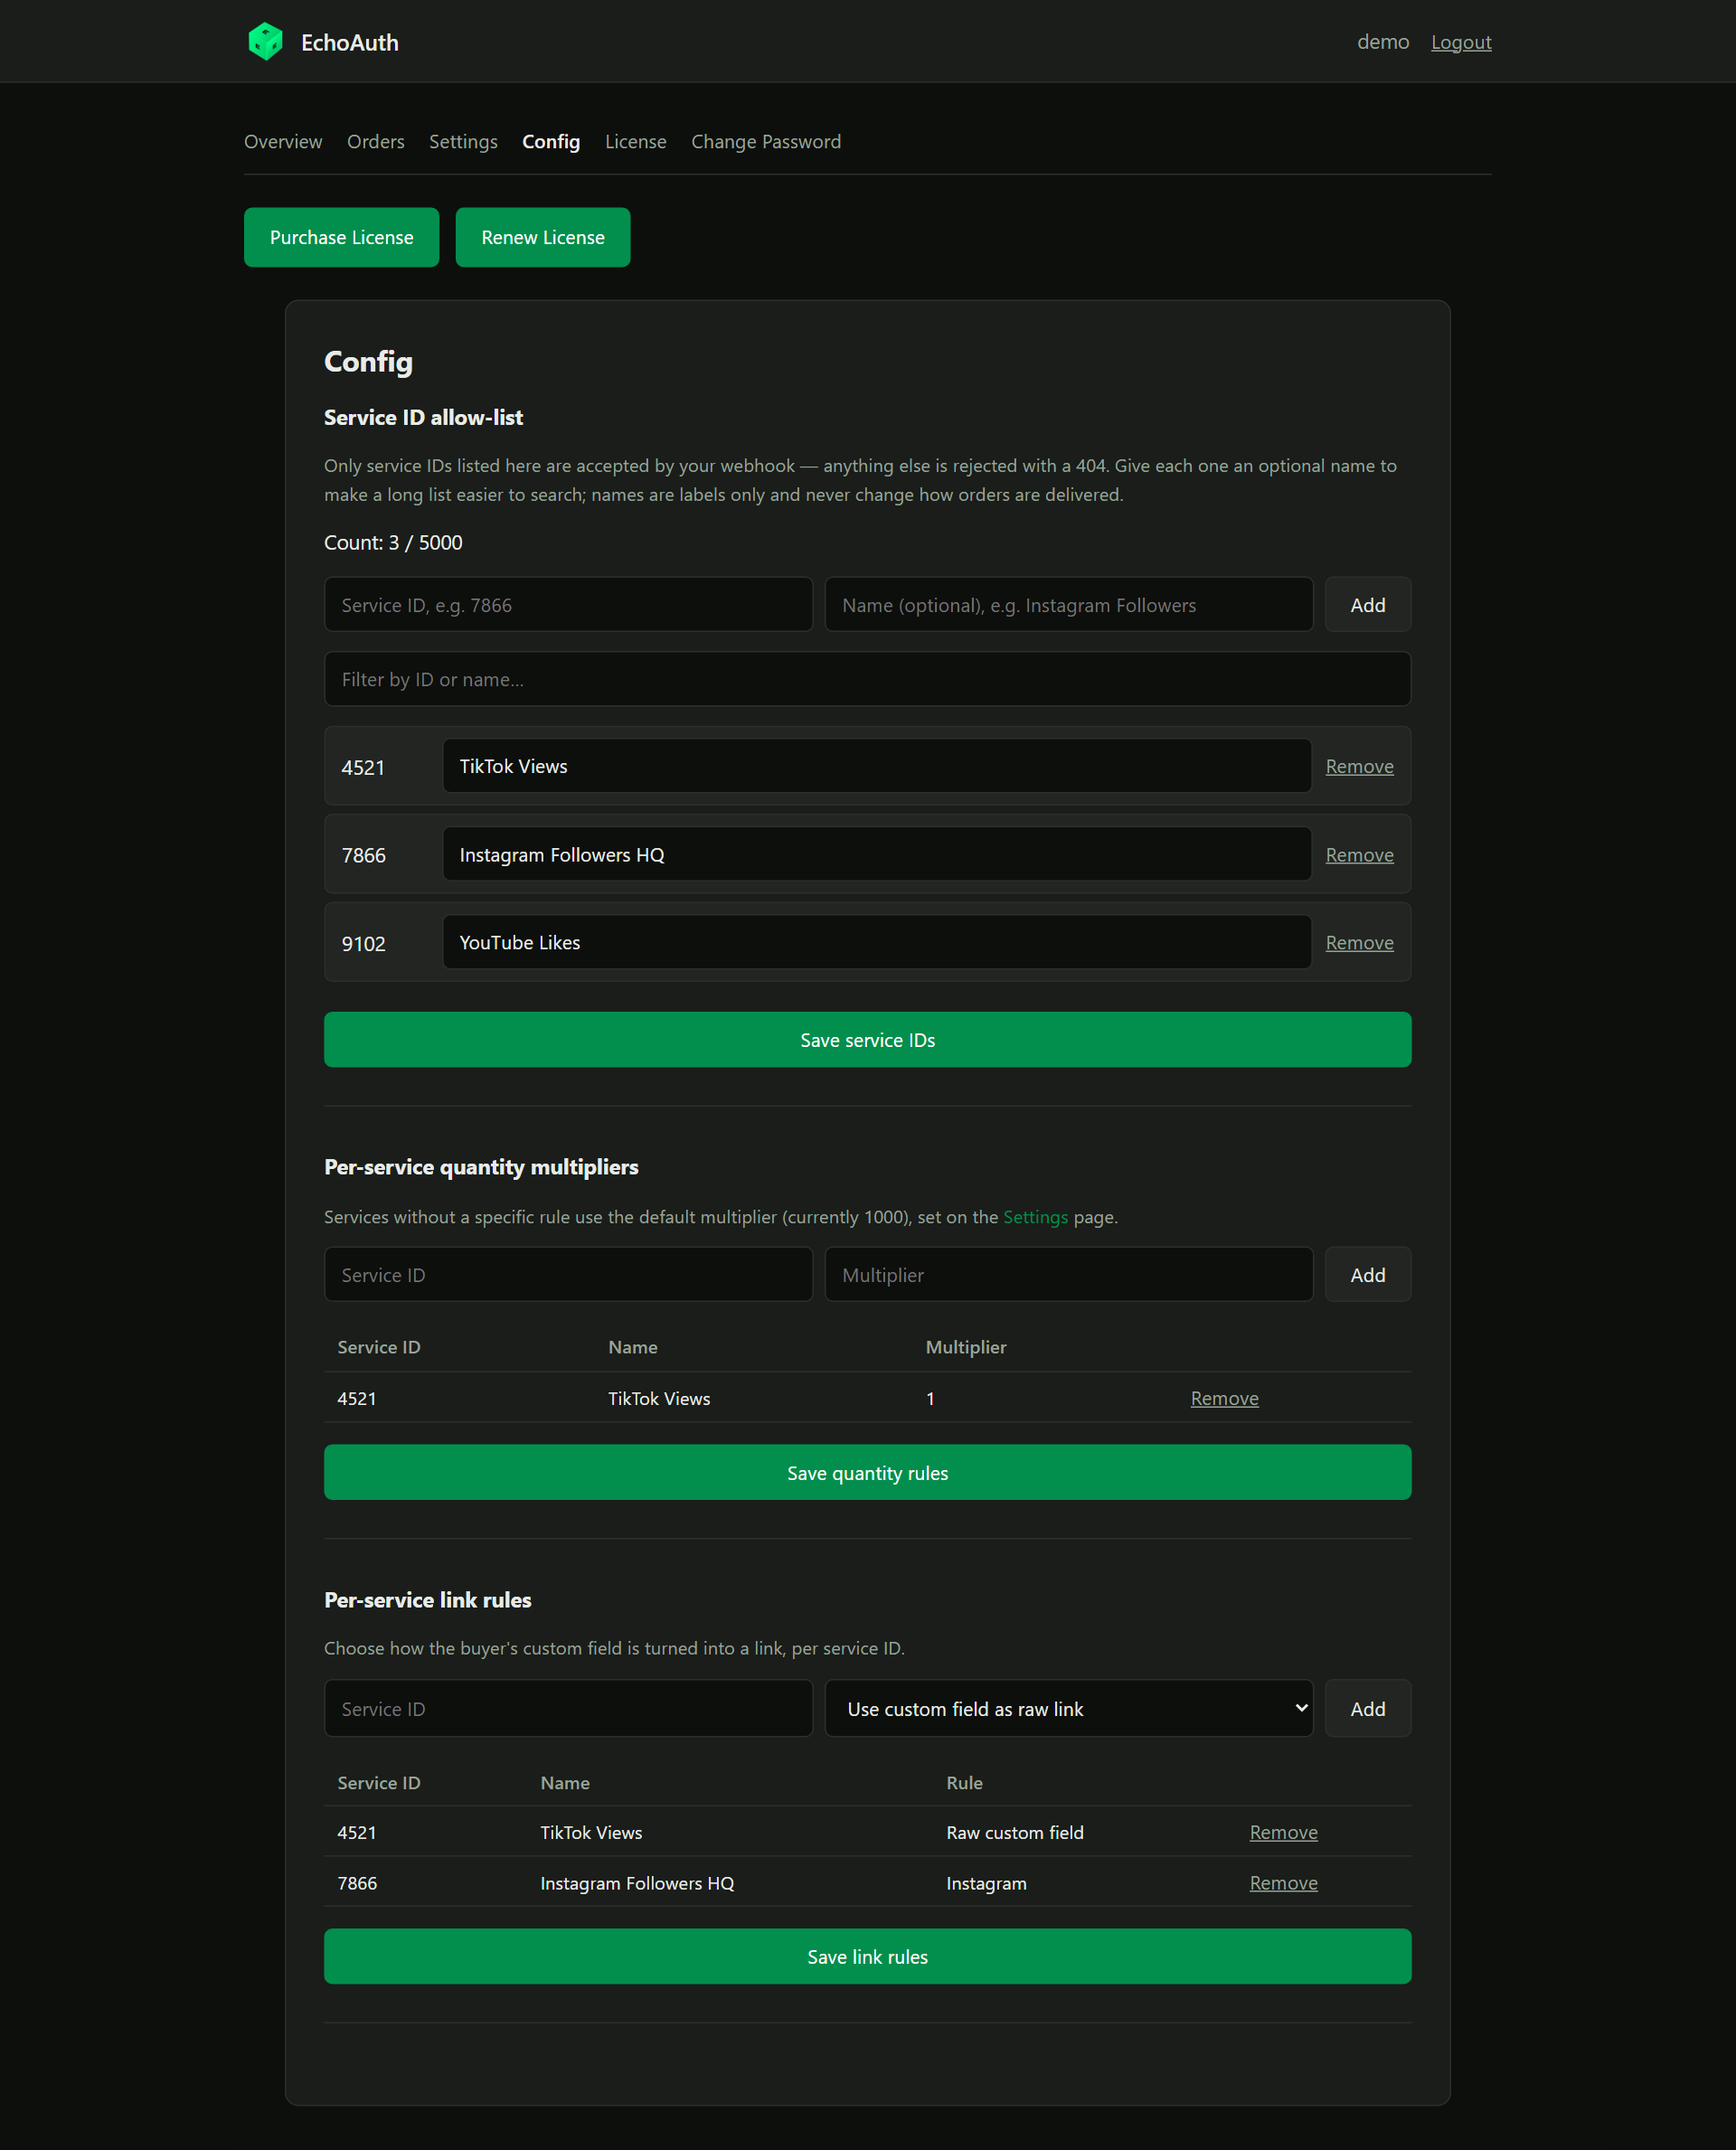 Add every panel service ID you sell (up to 5,000). Any order for a service ID **not** on this list is rejected. Give each one an optional name (e.g. "Instagram Followers HQ") to keep long lists searchable — names are labels only.
Click **Save service IDs**. Takes effect immediately.
Some panels count quantity in different units (e.g. 1 unit = 1000 followers). Set a multiplier per service ID. Anything without a rule uses the default multiplier from Settings.
Click **Save quantity rules**. Takes effect immediately.
Choose how the buyer's custom field becomes a link:
* **A platform** (Instagram, YouTube, TikTok, Twitch, X, Kick, Threads) — the buyer's username is turned into the right profile URL automatically.
* **Use custom field as raw link** — the buyer provides the full link themselves.
Click **Save link rules**. Requires a **Rebuild** to apply.
Go back to **Overview** and click **Rebuild**. This pushes your Settings and link rules to your running order processor. Check that **Infrastructure status** shows **success**.
The **Overview** page now lists one **Dynamic Delivery URL** per service ID. Each has the format:
```text theme={null}
https://smm-delivery.echoauth.dev//deliver/
```
For example, Shop ID `1234` selling service `7866` uses `https://smm-delivery.echoauth.dev/1234/deliver/7866`.
Add every panel service ID you sell (up to 5,000). Any order for a service ID **not** on this list is rejected. Give each one an optional name (e.g. "Instagram Followers HQ") to keep long lists searchable — names are labels only.
Click **Save service IDs**. Takes effect immediately.
Some panels count quantity in different units (e.g. 1 unit = 1000 followers). Set a multiplier per service ID. Anything without a rule uses the default multiplier from Settings.
Click **Save quantity rules**. Takes effect immediately.
Choose how the buyer's custom field becomes a link:
* **A platform** (Instagram, YouTube, TikTok, Twitch, X, Kick, Threads) — the buyer's username is turned into the right profile URL automatically.
* **Use custom field as raw link** — the buyer provides the full link themselves.
Click **Save link rules**. Requires a **Rebuild** to apply.
Go back to **Overview** and click **Rebuild**. This pushes your Settings and link rules to your running order processor. Check that **Infrastructure status** shows **success**.
The **Overview** page now lists one **Dynamic Delivery URL** per service ID. Each has the format:
```text theme={null}
https://smm-delivery.echoauth.dev//deliver/
```
For example, Shop ID `1234` selling service `7866` uses `https://smm-delivery.echoauth.dev/1234/deliver/7866`.
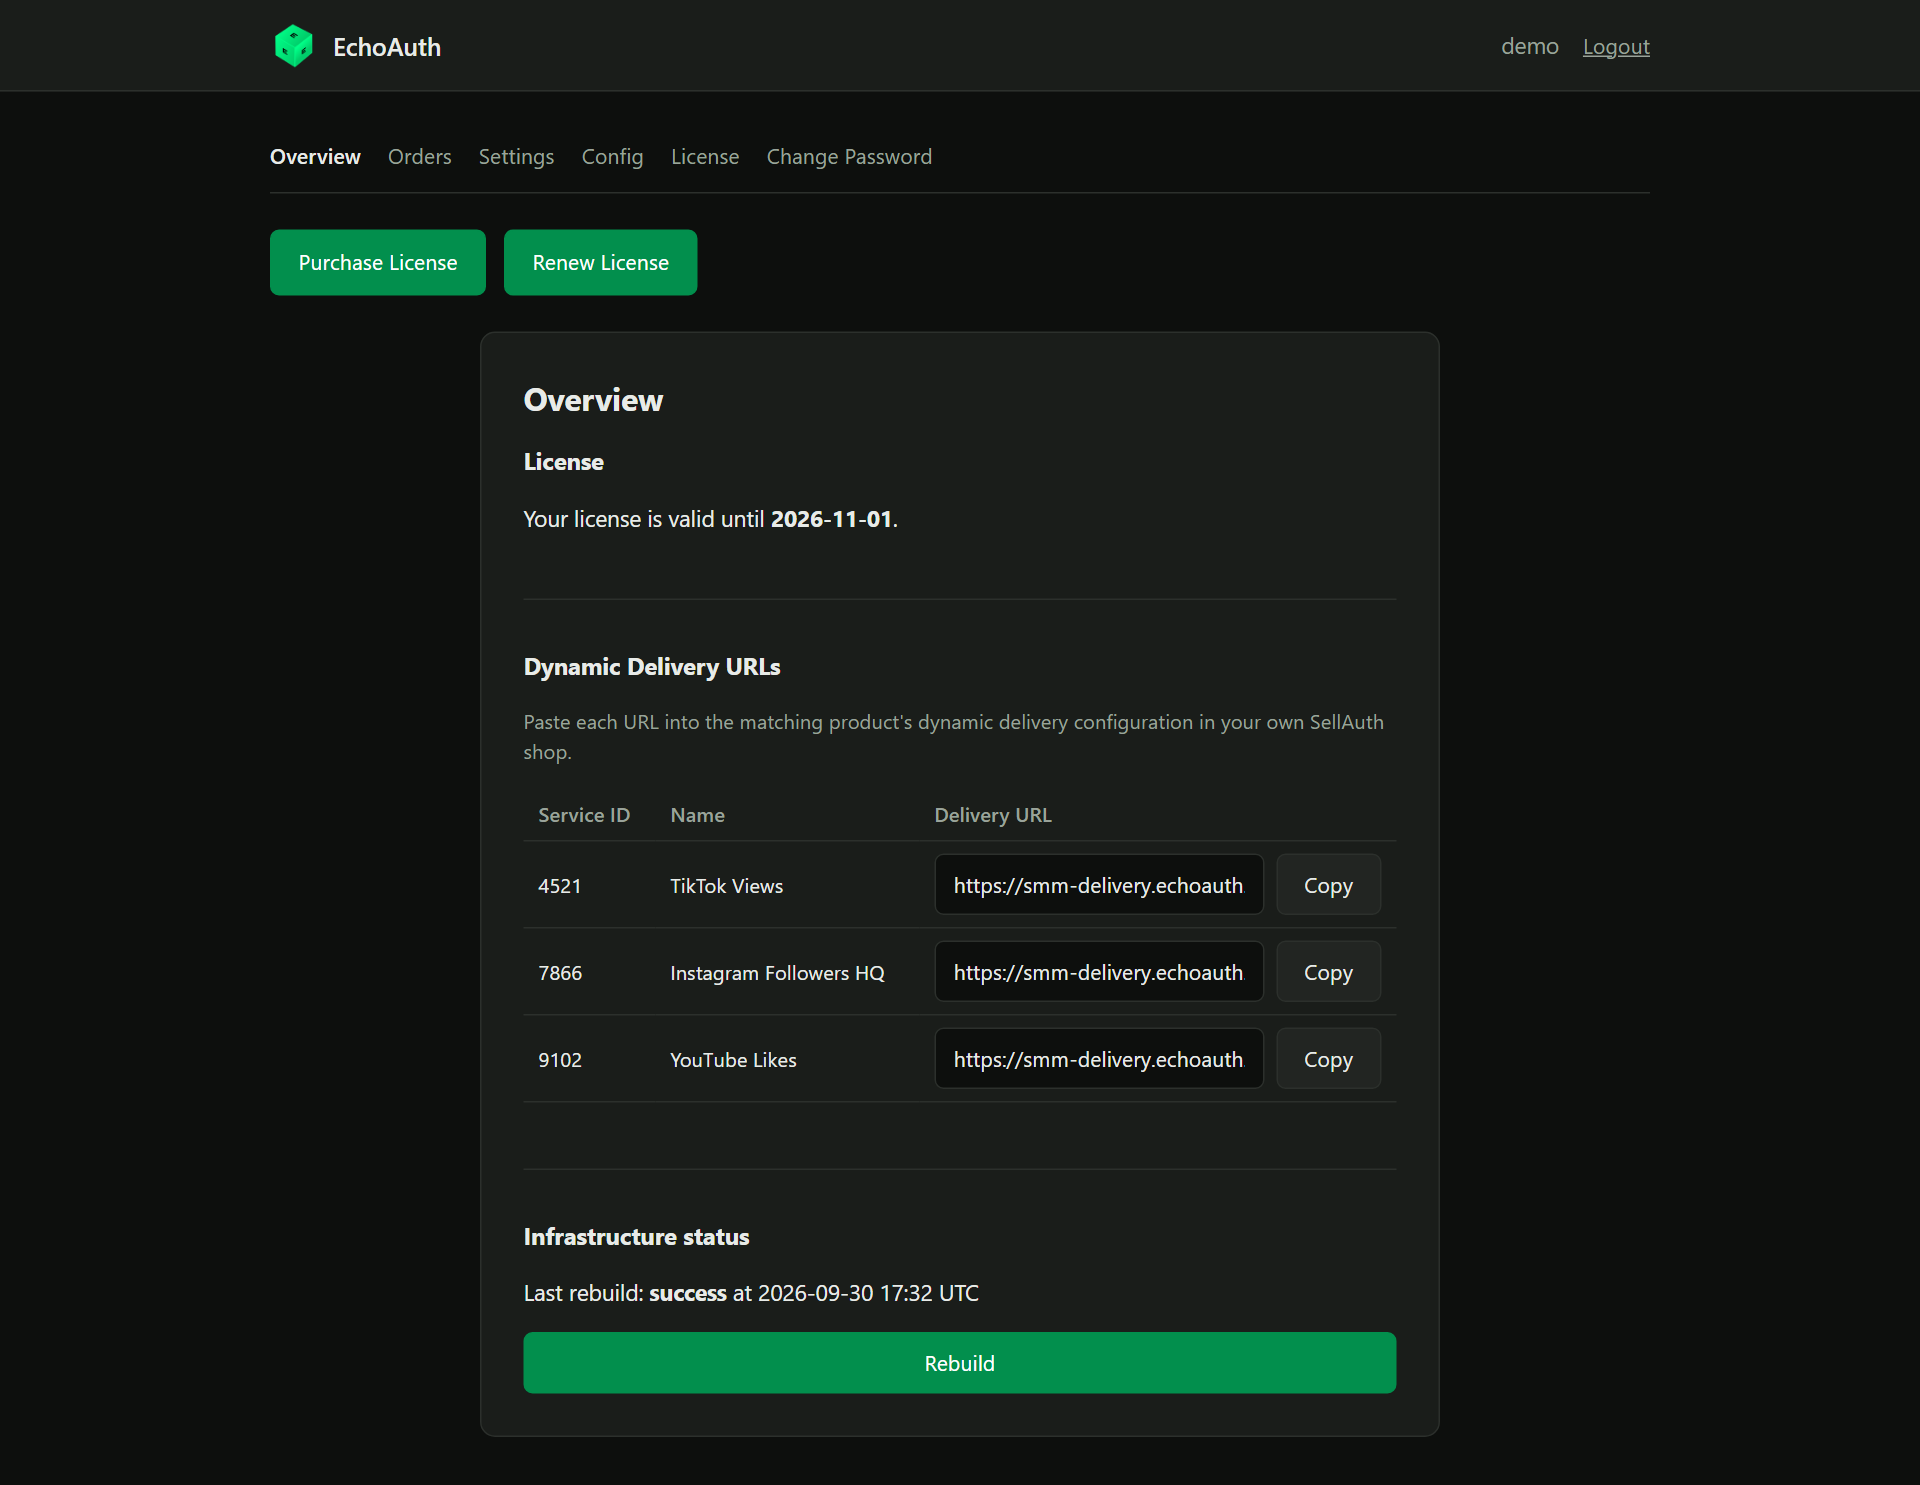 In your SellAuth dashboard, open each product (or variant), enable **Dynamic Delivery**, and paste the matching URL using the **Copy** button.
That's it — your shop is now automated. Place a test order to confirm it lands on your panel.
## After setup
### Track your orders
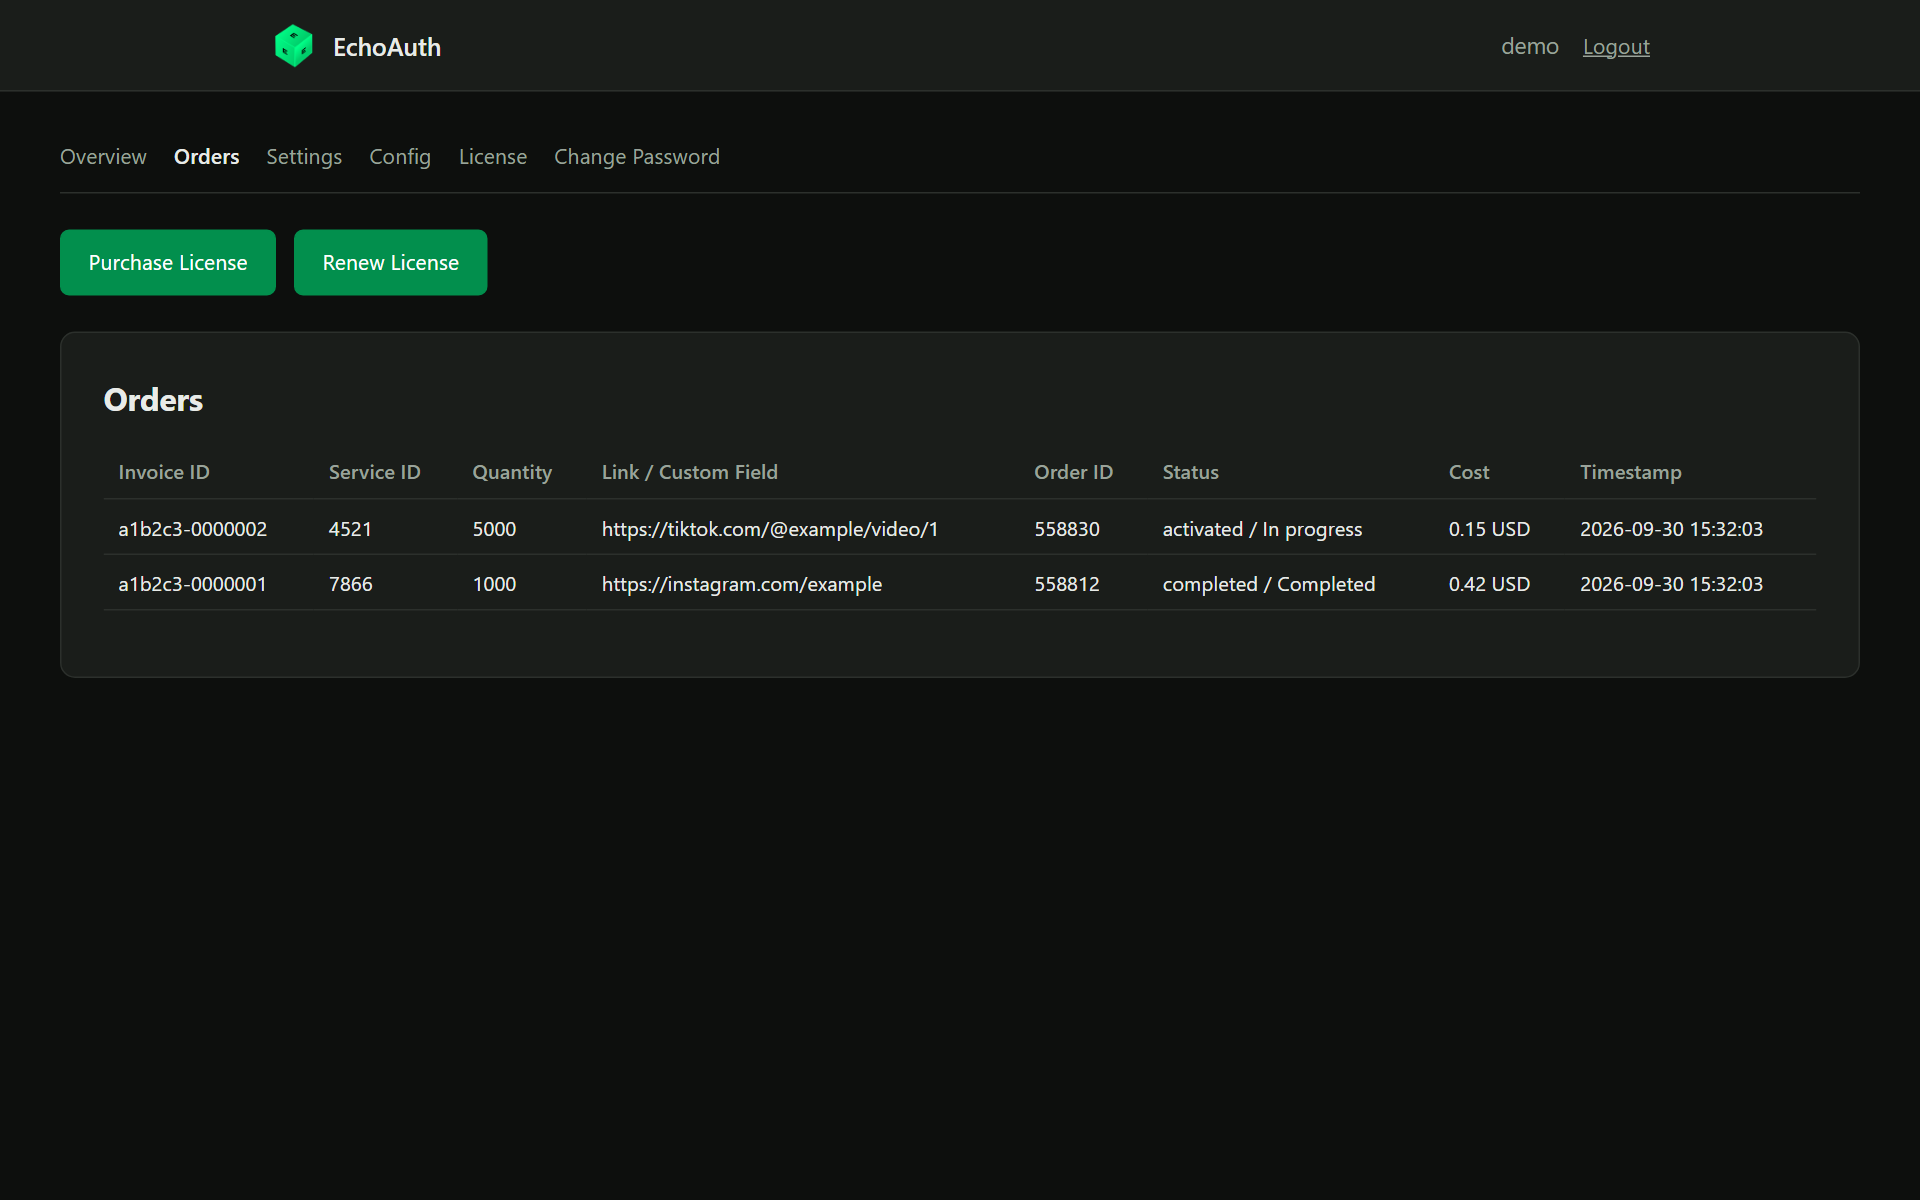
The **Orders** tab is a read-only view of your own order history: invoice ID, service ID, quantity, link, panel order ID, status, cost, and timestamp.
In your SellAuth dashboard, open each product (or variant), enable **Dynamic Delivery**, and paste the matching URL using the **Copy** button.
That's it — your shop is now automated. Place a test order to confirm it lands on your panel.
## After setup
### Track your orders
The **Orders** tab is a read-only view of your own order history: invoice ID, service ID, quantity, link, panel order ID, status, cost, and timestamp.
 ### Renew your license
The **License** tab shows your days remaining. To renew, enter a new license key and click **Renew License**.
### Renew your license
The **License** tab shows your days remaining. To renew, enter a new license key and click **Renew License**.
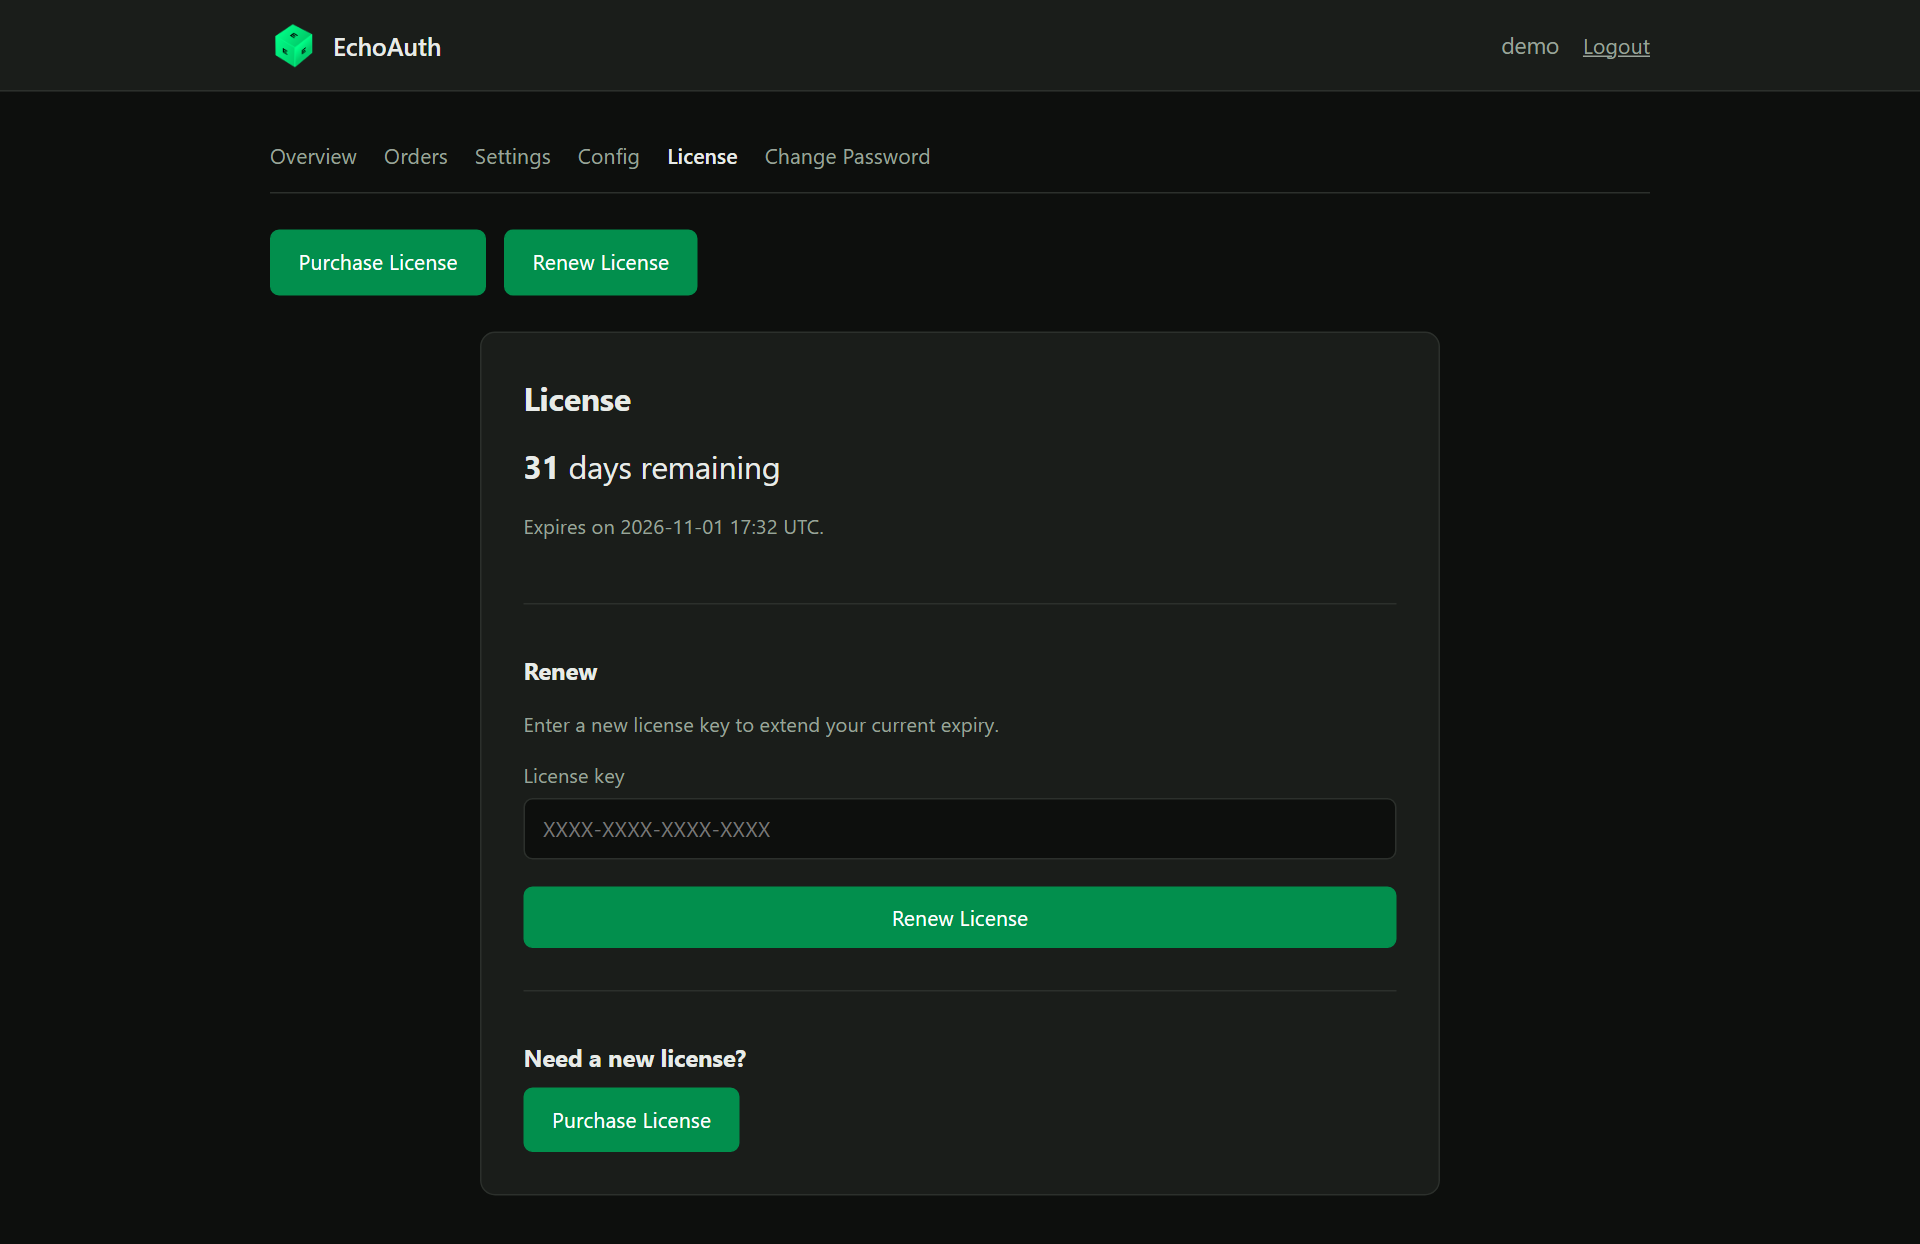 * New time is **added on top** of your current expiry — renewing early never costs you time.
* You get a Discord reminder **7 days before expiry** (to the webhook URL in Settings).
* If your license fully expires, your automation is shut down. Renewing reactivates and restarts it automatically.
## When do I need to Rebuild?
| Change | Rebuild needed? |
| - | - |
| Service ID allow-list | No — applies immediately |
| Quantity multipliers | No — applies immediately |
| Link rules | **Yes** |
| Any Settings field (API keys, panel URL, Discord, etc.) | **Yes** |
## Troubleshooting
Set your **SellAuth Shop ID** on the Settings page and add at least one service ID on the Config tab.
Make sure the product's service ID is on your **Service ID allow-list** and that you clicked **Save service IDs**.
Settings changes need a **Rebuild** from the Overview page before they take effect.
Your old `.echoauth.online/hook{serviceid}` URLs keep working. Use the new `smm-delivery.echoauth.dev` URLs for any new products.
* New time is **added on top** of your current expiry — renewing early never costs you time.
* You get a Discord reminder **7 days before expiry** (to the webhook URL in Settings).
* If your license fully expires, your automation is shut down. Renewing reactivates and restarts it automatically.
## When do I need to Rebuild?
| Change | Rebuild needed? |
| - | - |
| Service ID allow-list | No — applies immediately |
| Quantity multipliers | No — applies immediately |
| Link rules | **Yes** |
| Any Settings field (API keys, panel URL, Discord, etc.) | **Yes** |
## Troubleshooting
Set your **SellAuth Shop ID** on the Settings page and add at least one service ID on the Config tab.
Make sure the product's service ID is on your **Service ID allow-list** and that you clicked **Save service IDs**.
Settings changes need a **Rebuild** from the Overview page before they take effect.
Your old `.echoauth.online/hook{serviceid}` URLs keep working. Use the new `smm-delivery.echoauth.dev` URLs for any new products.